Automatic Temperature Control (ATC) – Fault Codes: (only for 584 Forwarders and 584HD Forwarders)
Troubleshooting
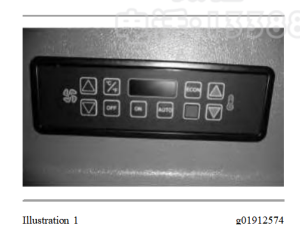
To display fault codes, depress the ON key three times in rapid succession. The digital display will then display any active fault codes. Pressing the ON key again repeatedly will scroll through any
existing error codes. After five seconds without further key presses, the system will exit the diagnostics mode and return to normal operation.
No Faults – E0
Cab Sensor Shorted – E1
Cab Sensor Open – E2
Evaporator Probe Shorted – E3
Evaporator Probe Open – E4
Duct Sensor Shorted – E5
Duct Sensor Open – E6
Pressure Transducer Open – E151
Pressure Transducer Shorted – E12
Water Valve Actuator Error – E13
Electronics or Comm. Error – E17
*
Clutch Open – E18
*
Clutch Shorted – E19
*
No Refrigerant – E20
*
High-pressure – E22
*
Low Voltage Error – E23
* Future implementation
Advanced Diagnostics:
The ATC Advanced Diagnostics control panel allows the technician to see real-time system
information on the control panel display. Control panel display will assist in A/C-heater servicing. This real-time information can help the service technician diagnose certain system problems.
To display advanced diagnostics, depress ON key three times in rapid succession (fault codes
displayed) then immediately press and hold ON key for five seconds. The text “CAB” will be
displayed. After a few seconds, the real-time value of the cab temperature measured by the ATC is displayed. This value, as well as any other value displayed by the control panel, will continuously update. Pressing the ON key again repeatedly will scroll through all of the available diagnostics
information
CAB – Cab Air Temperature (°C or °F)
EVAP – Evaporator Core Temperature (°C or °F)
DUCT – Duct Air Temperature (°C or °F)
HEAT – Water Valve Command (% of valve open)
A-C – A-C Clutch Request (on / off )
FAN – Blower Fan Speed (% of maximum fan speed)
DEF – Defrost Mode Active (On/Off)
HI-P – High Side Pressure (psig or bar)
PRHT – Blower Enable Active (On/Off)
VOLT – System Voltage (DC Volts)
Note: The system can be operated normally while in advanced diagnostics mode, including
changing the temperature set point or changing the blower fan speed, to evaluate the response of the system.
Firmware Version Mode
The firmware version of the control panel and Electronic Control Unit (ECU) can be displayed.
From the advanced diagnostics mode, press and hold the ON key for five seconds. The text CTRL will be displayed and after a few seconds, the control panel firmware version number will be
displayed. Pressing the ON key will toggle to the ECU firmware version.
The following firmware version information is available:
CTRL – Control Panel Version
ECU – ECU Version
Exiting the Diagnostic Mode:
To exit the advanced diagnostic mode or firmware Version mode, turn the system OFF by pressing the OFF key.
Additional Troubleshooting:
No Display
- Turn on control panel with theON key.
- Check to see ifthedisplay Illuminates.
- Verify that the control panel is plugged into the wire harness.
- Check to see ifwire harness is wired into vehicle properly.
No Fan
- Turn up fan with thefan UPkey.
- Make sure that the fan is plugged into wire harness, verifyall wiringconnections.
- Verify that the circuit breakers or fusesareintact.
- Ifall other functions work properly, replace ECU.
No Heat
- Turn up heat with the Temperature UP key. Use the advanced diagnostics to verify that thewater valve is commanded open.
- Inspect and verifyall wiringconnections.
- Verify that any coolant shut offvalveson the engine are open.
- Verify that warm coolant is flowing into the heater core by testingthe heater hoses.
- Inspect and replace the electronic water valve ifnecessary.
- Inspectandreplace ECU if necessary.
No Cooling
- Turn down heat with the Temperature DOWN key andenablethe defrost mode. Use the advanced diagnostics to verify that the A/C clutch is requested ON.
- Verify that the system is fully chargedwithrefrigerant.
- Verify that voltage is present at the compressor clutch.
- Verify that the correct voltage is present at the clutch relay onthewire harness.
- Inspect and verifyall wiringconnections.
- Inspectandreplace clutch relay if necessary.
- Inspect and replace refrigerant high-pressure and/or low-pressure cut outswitches ifnecessary.
- Inspect compressor and clutch assembly and replace clutchifnecessary.
The system is not controlling the cab temperature properly
- Inspect the cab air temperaturesensor.
- Verify that the recirculation vent inlet is not obstructed. Inspect and replace recirculationventair filter if necessary.
- Inspect and replace recirculation vent air filter, ifnecessary.
- Change the setpoint temperature insmall increments.
- Verify that the water valve is working properly. Refer “No Heat”(see No Heat).
- Verify that the compressor clutch is working properly. Refer “NoCooling”.
The evaporator core is icing up and restricting airflow
- Inspect the evaporator core probe.
- Verify that the probe is making good contactwith the evaporatorfins and is not loosely inserted.
- Reposition the probe and check the core temperature during operation using theadvanceddiagnostics.
- Replacetheevaporator core if necessary.